Last spring, my neighbor Dave in Westfield was out in his yard, cursing at a drenched basement floor. His sump pump had been quiet all winter, and he figured it’d just keep chugging along. But a quick thaw and a heavy April storm were all it took to send a few inches of water into his finished basement. He called WaterPros in a panic, and they got things sorted out, but it cost him way more than a simple check‑up would’ve. Don’t be like Dave. A little spring maintenance goes a long way, especially around here where the clay soil holds water like a sponge and the spring rains can be relentless. So grab a flashlight and let’s walk through a straightforward sump pump maintenance checklist for Indiana spring—your basement will thank you.
Why Indiana Spring is Tough on Sump Pumps
Come March, the freeze‑thaw cycles around Westfield and Hamilton County do a number on the ground. The soil heaves and settles, sometimes cracking discharge lines or shifting the pop‑up emitter just enough to clog it with winter junk. Then April and May storms dump inches of rain, and that water has nowhere to go but straight toward your foundation. The clay in our soil saturates fast, pushing groundwater pressure against basement walls. If your pump isn’t in top shape, you’ll see that pressure turn into a wet floor real quick.
I’ve heard from more than one homeowner in Fishers who figured last year’s quiet season meant the pump was immortal. That’s like skipping an oil change because the engine didn’t seize yet. The pump sits in a pit full of grit, occasional rust, and maybe a little iron bacteria that grows in dark, damp places. All it takes is a sticky float switch or a blocked intake, and suddenly your finished basement is a wading pool.
The Simple Spring Sump Pump Maintenance Checklist
Grab a bucket and a pair of gloves. This isn’t complicated, but it does need a few careful steps. I’ll walk you through what matters most.
Safety First, Always
Before you even look at the pump, check the electrical. The pump should be plugged into a dedicated GFCI outlet—no extension cords, no shared circuit with the freezer. If the outlet trips when you press “test,” great. Reset it. If it doesn’t trip, or if the cord is frayed, you need an electrician or a plumber who handles pump installs. Unplug the pump every time you’re reaching into the pit. Water and electricity don’t mix, and I’ve seen too many close calls from folks who skip this step.
A lot of newer homes in Carmel and Zionsville have the outlet mounted high, with a drip loop on the cord so water can’t run into the plug. That’s the right setup. If yours is on the floor, WaterPros can move it for you. It’s a small fix that avoids big trouble.
Peek Inside the Pit
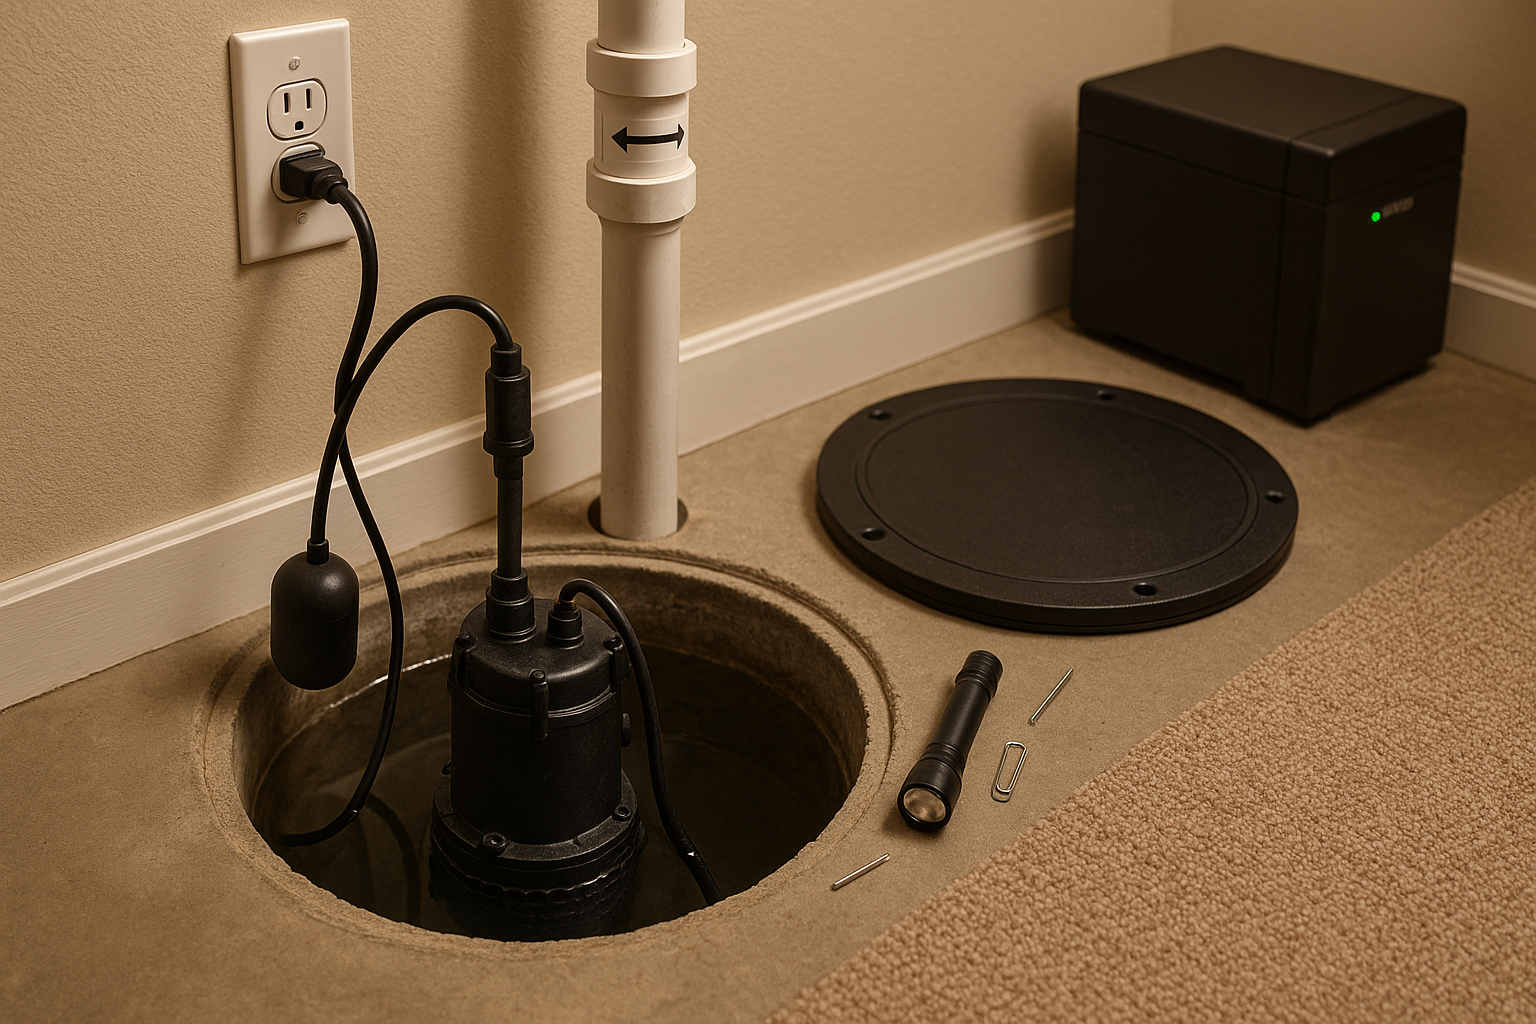
Take that lid off. If it’s a sealed lid with a radon‑tight gasket, pry carefully so you don’t tear the seal. A sealed lid helps keep humidity and radon gas out of your living space—important around here where radon levels tend to run high. Once open, look for debris. Stones, silt, little toys that fell in—whatever. Scoop it all out and wipe the liner so the float has room to move.
A clean pit also discourages iron bacteria, that slimy orange stuff that can gum up the float and pump intake. If you notice a rotten‑egg smell, you might need a lid that seals better, especially if the sump is near a living area. That’s one of those things WaterPros handles when they install a new pump or do a full inspection—they’ll match the lid to your radon system if you have one.
Check the Pump Itself
With the pit dry(ish), look at the pump intake and the impeller area. Pull off any muck or rust. Submersible pumps usually have a little weep hole or air‑bleed about a couple inches above the bottom. Find that and poke it clean with a paperclip. If that hole clogs, the pump can airlock after sitting idle all winter—it’ll hum but not move water. I had a call from a guy in Noblesville whose pump ran for an hour but barely spat because the weep hole was plugged. Two seconds with a nail fixed it.
Lift the Float Switch
Reach in and move the float up and down by hand. It should glide without catching. Sometimes the cord gets twisted around the discharge pipe or the pump itself. Untangle it so the float can rise freely when the water does. If the float feels sticky or the pump doesn’t start when you lift it, that’s a sign the switch is going bad. Replacement switches exist, but honestly, by the time you mess with an older float, a full pump swap might be smarter.
Test with a Bucket of Water
This is the real test. Pour water into the pit—maybe 5 gallons—until the float engages. The pump should kick on, clear the pit, then shut off within a reasonable cycle. Listen for odd noises, like a loud thunk when it stops. That’s often a check valve slamming. A quiet check valve makes a big difference, especially if the sump is under a bedroom.
While it’s running, look at all the joints between the pump and the discharge pipe. Any drips? Tighten clamps or PVC unions. The check valve, that one‑way door that keeps water from pouring back down, must have the arrow pointing up. If it’s backward, water will just cycle forever. And if you hear a water‑hammer sound, upgrading to a full‑port, spring‑loaded check valve might quiet things down.
Trace the Discharge Line
Follow the pipe from the pump to where it leaves the house. In most local homes, it’s rigid PVC running along the basement wall, then through the rim joist to the outside. Look for cracks, missing supports, or sections where water pooled and froze over winter. If you still have flexible corrugated line, consider swapping it to PVC. Corrugated pipe crushes under soil weight and tends to hold water, making it more likely to freeze and split next winter.
Head Outside to the Exterior End
Walk to where the pipe spits out. Is the pop‑up emitter visible, or did the lawn mower eat it? Clear away mulch, leaves, and any gravel that piled up over winter. The discharge should hit daylight at least 10 feet from the foundation. Any shorter, and water just soaks back against the wall, overloading the pump again. If the pipe terminates underground in a dry well or a French drain, make sure the ground over it isn’t soggy, which could mean it’s clogged. For homes on flat lots in Westfield, a sloped discharge line that carries water to a curb cut or a drainage swale works best. WaterPros knows how to handle those tricky gradients—they deal with it all the time around here.
Battery Backup and Power Outages
Spring thunderstorms knock out power across Indianapolis and the north suburbs at least a few times a season. If your primary pump stops, you’ve got about 20 minutes before the pit overflows. A battery backup system buys you peace. Test it the same way you test the main pump. Check the battery terminals for corrosion and make sure the charge light is green. Batteries die every few years, so if yours is over 3, replace it now.
We wrote a whole post about battery backups, because the last thing you want is to come home from work to a flooded basement after a random storm.
When Other Home Systems Tie In
Your sump pump doesn’t live in a vacuum. Other parts of your plumbing and groundwater setup affect how hard it works.
Water Softener Drainage
If you have a water softener, its backwash cycle dumps a good chunk of water into your sump pit periodically. Make sure that extra volume doesn’t overtax your pump. A half‑horsepower pump might be fine for groundwater alone, but add a softener regenerate and a leaky foundation drain, and you could be pushing its limit. WaterPros supplies and services water softeners, so they can look at the whole picture and make sure the pump’s capacity matches the total load.
Septic System Considerations
For homes on septic—common in more rural parts of Hamilton County—it’s critical that the sump pump never discharges into the septic system. Pumping groundwater into a tank or drainfield overloads it and can cause a messy, expensive failure. Code requires a separate discharge for sump pumps. If you’re not sure where yours ends up, have a septic‑savvy drainage pro trace the line. WaterPros handles septic system service too, and they’ll confirm everything is routed correctly.
Well Water and Groundwater Levels
Well drillers around Westfield often note how high the water table rises in spring. That affects your sump pump’s workload directly. If your well was drilled recently, you might have records of static water level—that’s a clue to how much groundwater pressure your basement faces. Plus, if your sump water is particularly rusty or smelly, it might be worth testing your well water to check for iron bacteria or sulfates. Those can corrode pump parts faster.
Smart Drainage Around the House
Beyond the sump pit, whole‑property drainage makes a huge dent in how often your pump runs. Clean gutters, downspouts extended 5 feet from the foundation, and grading that slopes away from the house all keep water out of the pit. If you’ve ever had a slow‑draining yard after rain, you know how quickly that water can seep down. Sometimes a catch basin or a French drain off the downspouts is the best investment you can make.
When to Bring in the Pros
You can do a lot of this yourself, but a few things call for a trained eye. If the pump is more than 7–10 years old, the seals are probably wearing. If the GFCI keeps tripping, there might be a short or moisture in the housing. If the pump runs continuously even when the pit is dry, the check valve could be gone or the switch might be hung up on something. And sizing a new pump—matching horsepower, head height, and basin capacity to your home’s actual load—isn’t a guess. It’s what WaterPros does every day in Westfield, Carmel, Fishers, Zionsville, Noblesville, Greenwood, Brownsburg, Avon, and Plainfield.
They’ll show up, walk you through the checklist with you, and give you an honest read on what your system needs. No scare tactics, no upsells—just straightforward advice. If a backup battery makes sense, they’ll explain why. If your discharge line ends in a puddle next to the house, they’ll re‑route it. And if the pump is fine, they’ll tell you that too.
Don’t Wait for the Next Downpour
Spring rains in Indiana aren’t subtle. The ground will saturate, the sky will open, and your sump pump will either do its job or it won’t. A couple hours of maintenance now beats ripping out carpet later. If you’d rather have a pro handle it, hit the quote page on our site and ask for a spring sump pump check. They’ll get you on the schedule fast—before the next storm leaves you with a basement like my neighbor Dave’s.
Need a plumber you can call back?
Licensed Indiana plumbers, flat-rate pricing, and a written warranty on every job.